


Hello! My name is Danielle and I blog over at The Life of an "Ordinary" Housewife. I'm so glad that I have the opportunity to guest post here and get to know you guys! :) Stop over and say hi, I would love to have you! So, normally on my blog I have a tutorial every Tuesday. So far it has been crafty, but I'm thinking about switching it up and doing some cooking/baking tutorials as well. Since it's Tuesday, I thought it would be appropriate to share a tutorial with you guys! :)
So, thank you so much Krizmah for giving me the opportunity to share with your readers! You are the best!
Materials Needed:
1. Canvas {can be any size-found at any craft store}
2. Paint {I used acrylic-again found at any craft store}
3. Paint Brushes {different sizes to acheive different strokes}
4. Scraper of some sort {I know there's probably a technical name for it-I think you use it to spread drywall compound}
5. Something to hold your paint {I couldn't resist this paint wheel thing}
6. Sink {to rinse your brushes}


These are the brushes I used. I think I found them at Joann Fabrics. You can see they are for acrylic, watercolors, and stains.

Here is the paint up close. You can see it's a little tube but the great thing about acrylic paint is that you don't have to use very much! A little goes a long way!

I actually squeezed out too much paint here. You don't need this much if you're doing a small canvas. I think mine was 3'x3'. But squeeze out the colors you want to use. I ended up adding more colors just because I didn't like the way my canvas was turning out.

This is the brush that I used the most because it adds larger and smaller brush strokes. I did end up using the smallest brush as well towards the end to add little details, but I will explain that when I get to that step.

The first thing you want to do is choose which color you want as your base color. I wanted blue because out living room has a lot of blue accents. This is a very simple concept, but can take practice so be patient and remember IT DOESN'T HAVE TO BE PERFECT. That's the great thing about art...it's just that...art. Create!
When you dip your brush in your paint, get a bigger glob but not so it's sloppy. {I should have taken a picture of this but I didn't, sorry} Figure out where you would like your bigger chunks of paint to be on your canvas and start there. I wanted mine to be pretty random with the bigger strokes, so I started at the bottom and moved the brush from left to right...back and forth. If you want smaller stokes don't push as hard with your brush. This will create lighter strokes. Add more paint to your brush as you see necessary. Make sure you rinse your brush in between colors or you will end up getting a brownish, black color. Yuck!

Repeat step one for each layer of color you would like to add. Try to spread out your chunky strokes so it doesn't look like you have a pattern. Just plan out your strokes before you lay them down, because once your paint is down you can't get it back up. You can use your scraper thingy here to flatten out your brush strokes if you would like. I ended up not using mine, just because I liked the chunky feel of it.

Continue to add layers. Remember to spread out the chunky parts so you don't have too many clumps on one side or the other.


Here is a close up of the different colors. As you can see, it's ok to overlap the colors. I think this adds more character and seems more blended. Accidental art....sort of!

Here you can sort of see the chunkiness of the white paint. It adds texture and dimension to the art. Also, this is where you can also see the black strokes. I used the small brush for this because I didn't want too much black but just enough to highlight the light places.

Finished. Super easy, super quick, super cheap. Much cheaper than going out and buying one. Trust me if I can do this you can too! I'm not a painter by any means!!!
I couldn't decided if I wanted to hang it sideways or up and down.

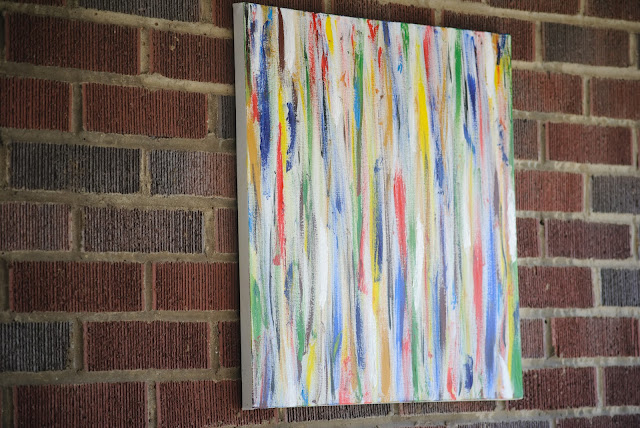
I decided on up and down! Someone said it looks like fish swimming up and down steam! That's the great thing about abstract art. It can be interprited so many different ways!
Again, thank you so much for allowing me the opportunity to share with you! Krizmah is such a great person and one of my best bloggy friends! Oh...she is the wonderful mastermind behind my blog design as well! She's amazing and such a doll to work with! If you need a blog facelift let her do it!!!
Love it! Looks like fun to make!
ReplyDeleteThanks! It's a lot of fun to make! :)
DeleteThats pretty cool. It does look fun to make
ReplyDeleteThanks! You should try it!
DeleteIf any of y'all make one for yourself, make sure to share pictures with us!!
ReplyDeleteI agree!! I want to see pictures!!
Delete