Showing posts with label Home-born How-tos. Show all posts

Wednesday, January 25, 2012

A Spruce of Pelmet Boxes

Hey y'all. I was inspired by this week's challenge over at the CSI Project to create something for my living/dining room windows that wans't going to break the bank or be something I couldn't conceivably do in a short window of time. I looked through some differing window treatment projects taht didn't involve curtains, and I came up with...

Pelmet Boxes!


My original inspiration was from Jenny, though let me warn you in advance, she makes this project look like an absolute dreamy breeze. But for me, it took a bit more hard work and duct tape masonry. I still love the way it turned out, but yes, it required a bit more money than I was originally intending (totaling about fifty dollars all things included, such as tools and fabric that I didn't have lying around), but I was still able to do it. So, go me! Now, let me share with you how I accomplished this feat.

Supplies:


-Linen (I used something called Duck Cloth)
-Batting
-Styrofoam Board (will talk about this in a minute)
-Staple gun & Staples
-1/4" Bias Tape
-Fabric Glue
-Duct Tape


Now, before I forget. In Jenny's rendition, she describes using something called foam core board. I went to a few different places and I can't seem to figure out just what in the heck she's talking about. So, my mom and I decided that we were going to get this insulation Styrofoam board that we found at home depot for about 2 bucks a pop for a 2x4. Now this project might have been a bit cheaper if I hadn't decided to cover an 80" window in my living room. Regardless, moving on.

First things first. The best way we found how to get your idea from your sketch to your foam is using a cardboard stencil. Make sure you add about an inch to your measurements of your window, giving you a half inch wiggle room to let the box settle over your curtains, it worked well for us. The stencil we used was half of our full design, so it was easier to transfer to two seperate pieces of foam, since our large main window was longer than what we could find. It was pretty simple to freehand and then trace, though I'm sure there could have been a more precise measurement system we could have involved ourselves in. I was happy how it worked out though. We also just used one of the thousands of folding knives my husband has laying around the house to cut the pattern once it was laid out.


As some of the more astute members may have noticed, yes, my duct tape is bright flamingo pink. My hubby bought that for me, and I don't hate it. But don't worry about your duct tape really, it won't show. Promise. Besides, you cover up almost the entirety of your base anyway, so it doesn't really matter if it's too pretty or not.

Next you're going to cut out pieces from your remnants of foam that extend back from the front of your curtains to the wall for your corners. Ours measured about 5". After you have that all cut out, it's time for your first bit of duct tape masonry. I'm going to say, the stability of all of this was actually pretty good. And it keeps it all light so you don't have to put a bunch of holes in your walls, just a few. (We have already come to accept we won't be getting our security deposit back). Attach your sides to the front structure of your box, attaching in the middle if needed if your structure is of the longer variety. I just used to strips, overlapping slightly at the top and bottom, and that gave me enough stability that I was happy with it.


After you've got that done, you're going to want to lay out first your linen like fabric, and then your batting. Lay your newly constructed box shape over the top of it, and do some pre-measuring. Make sure you're going to have enough to fold up over the ends of your design and upholster it. When you're satisfied, cut away the excess, and you're ready to do the most time consuming part of it.


This is where it got a bit complicated for me. I have never really worked with a staple gun. It took a full day for me to recover after my project was done for my hand to quit aching. And at the end of finishing it, my fingers were partially numb. I may be a sissy, but it was a time consuming effort. There was also the learning just what worked and what didn't, which was pretty much a trial by error. I will say, having some sewing experience helps with this in order to shape fabric to a curve, if you know what you're doing not so difficult. I had to have a bit of a trial and error refresher course.

But through the next step, you're going to be upholstering your pelmet box. Folding over the edges and stapling them down, enforcing them with a bit of duct tape in the corners if you need. Promise, it won't show and you won't have to tell a soul. Here are some helpful tips that I learned.

You can't have your staples too close together.


Let me let you in on a secret. Staples like to have more to grip onto than styrofoam. You can make this work, but you just have to be careful, and make sure your staples have lots of support. Mainly, other staples. It's best, I've found, if you can mount this project fairly soon after you finish stapling it up. Because the more you mess with it and toat it around, the more the staples are going to want to slip loose.

Don't get too far ahead of yourself.

If you start on a roll, and just get stapling away at your little curves and dips, I'm going to pretty much say you'll rip out your staples accidentally because you realize you have to pry up a bit to get a little helpful snip in or tuck or dart. And this will grow frustrating after a while. So my advice is to take it slow and just work a little at a time. And duct tape when you're not certain it will ever stay.

Creative solutions are a crafters best friend.


For instance. My design had a bit of a sharp dip right before the center, and my fabric wasn't cooperating very well, wasn't stretching the way I needed it to, and I was afraid the styrofoam was going to peek out if I cut too close. So my mother and I came up with this solution. I took a bit of scrap and tucked it around the styrofoam, and then felt confident enough to split the fabric far enough to get it where it needed to be. You can't tell on the finished project anything is different, and I'm sure it would have showed anyway, but it gave me the reassurance that it would be covered either way.

After you have all of that fun stuff done, you can flip your beauty over and look at it and make sure it's to your liking. Now is the time to make adjustments, make it lay just how you want to, so on and so forth. Mine were pretty good once I figured out how to staple them.

Next, you're going to want to add the boarder if you want to. If not, I think that'd look fine too, especially if it was a patterned fabric. But for me, I added a bit of chocolate colored bias tape along the bottom curvature of my pelmet box. My husband and I worked as a team on this, he laid the glue, I followed along behind with the tape. I'm not sure if hot glue would work as well here, especially with teh strings and the heat, but you are more than welcome to try it. I stuck with fabric glue since I had the time on my hands to let it dry. In the end, it should come around to looking something like this maybe!


In order to attach our pelmet boxes to the wall, we used these little brackets, which we also got at home depot. (Gotta love a craft project that you buy equal measures of supplies at Joann's and Home Depot!). I used two on each side for my long box, and one a side for the littler one. (Will be pictured at the end). I basically was able to finger screw these into my foam, careful not to tighten them to the point where I'd be shredding my foam. I felt they were pretty sturdy, and so far nothing has come crashing down, but I also practiced some duct insurance, and slapped a bit of flamingo paint on em just to make sure.


Then you get your husband to climb up and screw them to the wall, and voila! Instant color and class to an otherwise drab living room!


The little one is our dining room, and that window basically just is a holster for our air conditioner. The little box only took me probably an hour from start to finish, unlike the three or four that the bigger one took. But you know how that goes, you do it once, you're a pro after that.

But I hope this brings inspiration to someone out there! Because I know I was super stoked to see such a simple project that would add such a nice note of color and interest in my humble little living room. And while it wasn't perhaps as simple as the original tutorial made it out to be, I hope mine has helped open the possibilites for something truly great! I can't wait to hear from others and see how this might take off for other projects. I'm actually thinking if you flipped it upside down, it'd make a wicked headboard, something I've been dying for. So we'll see!

P.S. I finally got to enter into the CSI project's weekly link project party. Visit thecsiproject.com

Until next time fellow bloggers!
Tuesday, January 17, 2012

"Jersey" Inspired Valentine's Wreath


So today I made something for my mother, and as such, I knew it had to be something that wasn't particularly... my taste? But really, would be something she loved. And to be absolutely truthful, I think my mom would fit right in in Jersey. Leopard print, gaudy clothes and jewelry, she'd absolutely love it. So I took this as inspiration, and created this beauty right here.


Isn't wonderful? It makes me giggle and feel so fun every time I look at it, I'm almost sad that it'll be gone when I give it over to her. But even then, it will be amazing on my blog, so I can visit it. Now, to go about how I made it. It was very easy, I promise. Mostly because I had everything I needed, since I bought remnants of the leopard spandex blend and the bronze satin when I was last at Joann's, specifically because I knew that they'd be made into something for my mother at some point. And here was my point! So, what y'all will need...


  • Glue Gun
  • Crepe Paper (colors of choice)
  • Fabric for wrapping (I used a spandex blend)
  • Accent fabric/Ribbon (I used satin) not pictured
  • Wreath Mold


Now, to start, you're going to do, perhaps the obvious thing, which is wrap your wreath mold in your wrap fabric. I cut mine into about a two finger width strip, give or take, and then used a bit of hot glue on the beginning, and intermittently throughout the wrapping. Always make sure your ending and beginnings are in the back, easy hiding!


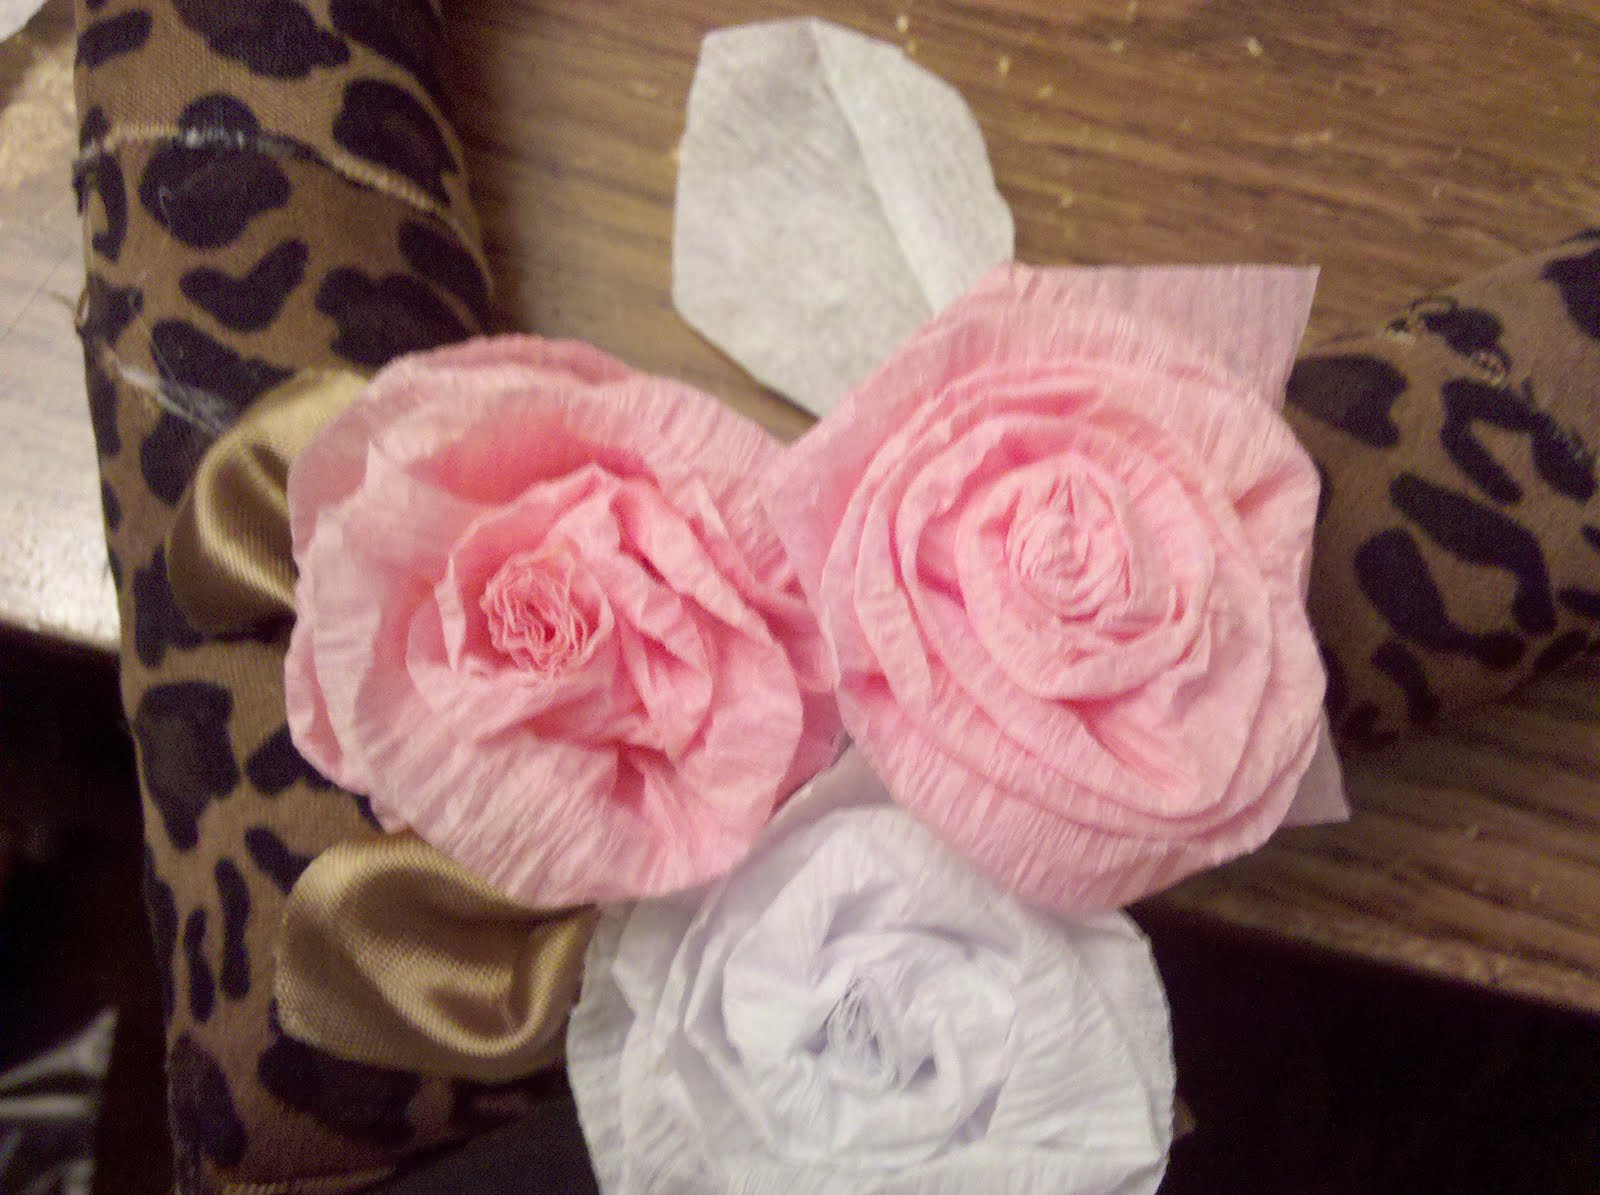
Then you're going to get out your crepe paper, and begin to craft yourself some roses. Be careful, because this is where you're going to burn yourself if any place. Also, apparently this stuff is nearly impossible to find anymore. I remember when you could get this in any party section, it was a staple. But we had to finally end up at the dollar tree before we found any.

If you've ever made fabric roses, they're kind of like that, though not having to fully twist the crepe paper outwards. A tip I found was to wrap it tighter towards the middle, and loosen up your wrapping towards the outside. Also, you can usually finger out the crepe paper into more petal like furls instead of straight, without having to twist the crepe paper so much. I used two different versions of roses, one where I didn't fold the crepe paper in half, and one when I didn't. This produces a longer stem or a flat back, so you can use that as a reference for what your needs may be.


To make my roses, I first touched a little line of glue down the width, to fold in the rough edge. Then tightly roll a few times to get the center of your rose, this is to personal taste how many times, I did it about three or four. Add a drop of glue, then continue to carefully wrap the paper. It's kind of an experimentation thing, as well as a practice thing. You know what a rose looks like, and to produce something like that, you roughly figure what you'll have to do. Remember to dot glue along the way, to help you keep secure and not unravel about at the end! If you are making longer stems, i.e. the full width of the crepe paper, just dab glue and trim the last of your trail. If you're making a flat rose, when the crepe paper is folded in half, (the opening facing downwards, mind you), dab glue to seal it, cut the tail so there's about an inch or so on the end, and cover the bottom of your flower with rose then the tail, to give it a nice smooth finish and voila!

Here's a picture of a long stemmed (left) vs a short flat rose (right). I prefer the look of the longer one better, since the petals are a bit more delicate looking. But I enjoy the workability of the flat rose better. So you know, you win some, you lose some.


Arrange your roses and secure with hot glue as you will. I chose to go a more minimal route, highlighting the leopard rather than the roses, but you can go as crazy as you want. I've just been seeing a lot of minimal wreaths lately, and kind of fell in love with the look.

I decided I also wanted some leaves to flesh out my roses, and decided to do them in the contrasting satin I'd bought along with the leopard print. To do these, I cut out a vague spade like shape, (my flowers ended up about 1 1/2", and the leaf shape was about 1 3/4" at the base), then pinched it somewhat accordion style. Sorry if my instructions are a little vague, I was kind of making this up as I went. Then I glued the v formed together, before proceeding to flip the leaf and glue the two ends to the sealed v. Now, pictures, and hopefully all that made sense. If anyone wants to know how I did it and my instructions weren't clear enough, leave me a comment, and I'll try and explain it better.


Then you use those leaves just as little fodder, glueing along the sides and/or the bottom to help stick em, something I enjoyed that there was options that way. When you're satisfied with your flower arrangement, you're nearly done with your project!


Now I'm sure some of you more experienced crafters can figure out how to do this a bit more gracefully than I, but I for one, am not a particular perfectionist with my projects. I also know my momma will love me no matter what. So, here's how I added my ribbon, which is actually two pieces all together.

Cut a slice of your fabric, mine measured about 5x19", but it's really a taste thing as to how wide you want it to fall on your wreath. Next I sewed a hem down each side, about to the edge of my presser foot, to allow for a nice neat edge.


Okay, to start, on the backside of your wreath, glue down your ribbon carefully out of sight. Then, wrap down beneath and towards the top. Make sure to pull it as taut as you're able to ensure smooth lines and contour to the heart. Then run a narrow line of glue there above where your piece started, but not sealing it up. Mainly, this is so you can make darts, for lack of a better term, along the under curves of your heart, to make sure the fabric is flush and you don't lose the quintessential dip of the top of a heart. If you're making a round wreath, this is obviously not an issue. Then, I cut my ribbon at a bit of a v, and folded it down to glue along the edge of the back and bottom, to cover up your mess a bit, though if it's not completely covered, don't worry, going to be adding a bit more ribbon here shortly.


After this, I folded the rest of my ribbon in half lengthwise, right sides together, and put in a quick seam. Turning it right side out and pressing it, this was my hanging ribbon. You can do this any way you really wish to, because it's taste and preference, but I didn't like the look of the thick ribbon running up from it. You could also prepare a thinner ribbon the way you did the thicker, but I enjoy saving things for other projects as well, so decided to use what I already had.


I folded my bottom edge up a bit and glued it down in a faux hem, mainly because I dislike the look of messy lines and such.


And after gluing it to the back of your project, voila! There you have your project. All finished and beautiful. I really loved how it turned out, and hopefully it works as inspiration for someone else out there! It's also fairly cheap, especially if you use scrap fabric and/or remnants.

Happy crafting!

Sunday, January 15, 2012

Vintage Rhinestone Bracelet Knock-Off

Hello out there once again, and today I'm rather proud to be sharing perhaps my first very own creatively inspired knock off tutorial. Now my 'knock off' is pretty much of the design and layout of the bracelet I'm about to share with you, but there are changes, such as color and a few upcycle choices. So, no, I'm not going to be trying to hawk this off as an original, please breathe easy. Well, time for the inspiration!

Vintage Rhinestone Bracelet found at Barneys... for $600


Now, I fell in love with this vintage-esque inspiration, and the fact that it all looked like elements I could realistically replicate. My issue, is the fact that this is advertised, as in fact, rhinestones. And yet...they are insisting upon selling it for six hundred dollars. Please tell me if I'm way off base in wondering why this would be able to be sold for that much? Though perhaps that's the point that it's still in their online store, though it happens to be 'one of a kind'. Regardless. Moving on!

Now I took it upon myself, for my design, to up-cycle, because I thoroughly enjoy the concept. Once again, I dipped into the cache of craft tidbits and delights that my sister forked over to me that contained all her jewelry making bits and baubles. My mother also contributed to this fund with a long rhinestone necklace that was collecting dust and stuff in her jewelry box. So, here is how mine turned out, and I think it looks obviously similar, though again, obviously, not precisely the same. I feel the idea is still there!


Isn't it beautiful? I thoroughly enjoyed this project, well, most of it. We'll get to that part later. And really, all you need is a fwe things, most of which can be found around your house. I would say probably ninety percent, at least, was all stuff I had around my house, as a crafter. But then again, it could also be picked up at a thrift store, the jewelry pieces anyway. So. What you will need is...

I actually ended up using an old piece of chain rather than the packaged shown here.


Supplies:
  • Embroidery Thread/Floss (I used DMC 5 in a pale lavender color)
  • Rhinestones -already connected-(an old necklace works wonderfully)
  • Needle with big enough eye to work with embroidery thread
  • Some fashion of rhinestone design for bottom layer
  • chain (clasps if needed)
  • Small scraps of lace


So! With all of this, the original sells for six hundred dollars. To pull off my look a like fashion, which I quite enjoy I might add, I paid a grand total of $1.59! I'd say that's a pretty good bargain, how about you? Now, I know that it will be a bit more for those of us who choose to buy some of the ingredients fresh so to speak, but I strongly encourage up-cycling a few old necklaces that never get worn, old costume jewelry works great! I'm also looking forwards to seeing more designs come from this hopefully! (if there really is any followers out there).

All right, to begin. I'm going to warn you right now of the hazards of embroidery thread. It was a thorough pain in my ass. I am a self proclaimed newby at all this crafty goodness, especially when it comes to create it yourself and not from a tutorial. So this was the first time I worked with many of my supplies today, including that damned embroidery thread. It came in this one big loop, and I thought, foolishly, to just snip the one string holding it together, and unwind it some, so I could measure it exactly how I wanted to before cutting it. THIS WAS A MISTAKE! It dissolved from that pretty purple spiral up in that picture, down to a snarled clustered mess in only about thirty seconds. I am still mystified as to how I did this. But it happened, and my husband proved his right to sainthood once more. He sat down on the floor with me, and we worked for two hours. Not kidding. TWO HOURS. To untangle that one long thread. It was infuriating to me, but my husband fondly calls it a 'bonding experience', and 'one big puzzle he had a good time with'. Yeah.. My husband.. saint.

BUT! Now that I have that out of my system, let's move onto the actual creation of our exciting piece, shall we?

Okay, first, I'm going to want you to take a measurement of your wrist. Give yourself a little wiggle room. Then we're going to do a mild calculation here. I had to perfect this as I went, and I still messed it up a touch, but I'm still happy with my results. So fret not, screw ups can always either be fixed or still look great. So, once you have your measurement of your wrist, complete this quick calculation.
Wrist measurement + 3 inches + (how long you want your tale end x 2)


Now that times two bit part is where I messed up. But, it still turned out pretty nice. That plus three inches is for when you braid your thread, it's about how much you lose. Now that you have that measurement, you're going to want to spool up your thread for lack of a better term. Basically, make a new loop, or somehow figure out how to measure it from the loop provided, but I'm just telling you how I did it. My husband got roped, perhaps literally, into helping me again. So, here was my process.


First we measured out one length of the thread (mine was about twelve inches), then I had him put his two pointer fingers on either side, and wrapped it around them, forming two sets of thirty strings. I looked at the picture to derive the guesstimation there, about how much the original showed, and it worked out well for me, thus making ten threads per section of braid. And two braids. This ended up in a braid about 3/8" wide. So that should give you a slight gauge, and you can adjust how you see fit.

So, after measuring it out, and counting a few times to make sure, since I'm a firm believer of count twice cut once, and then my vaguely neurotic tendencies encourage count four times and cut once, we cut the two ends, and wound up with two neat piles of thirty count a piece.


After that, it was time to braid. Measure off about how much tail you decided on, and what I did, was add a little hot glue to keep the three groups separate and more manageable, since I only have so many hands. This resulted in my inaugural burn from my new glue gun! My husband piped up from the background helpfully "Oh so now you know it's yours, right?". He's a peach. What worked for me with the binding process was to twist it between my fingers like the picture here..

I've no idea how this turned upside down.


Then add a daub of hot glue, wait for it to cool some, and then spreading it around the circumference with my fingertip and/or the tip of my gun. It worked really well for me and made the project easier, and I'm all about that.

Result


After that, I wrapped a piece of thread around the end a few times to bind it off and make it look pretty, then proceeded to braid.


Voila! End product.


After this, which is perhaps the most time consuming of the project, which tells you that this project isn't too terribly difficult, thus begins the layering. From here on out, basically you are just adding layers of the bracelet. I started with sewing the two braids together using the same embroidery floss with a simple whip stitch. (I hope that's right, just a simple quick stitch, that's what my mom calls it).

Ta-dah!


Okay. Moving on. First, we're going to grab our spare bit of chain we have laying around. I honestly would believe every woman has some kind of bit of chain that she no longer uses laying around her house at some point or another. Just gotta dig it out. But anyway, the trickiest part about the rest of this project is making sure things line up as you'd like them to, and getting started. or at least it was for me. Because I don't really know how one would use pins or anything like that, so mine was just a grab and pray method, and starting was the only bit I had an issue with. My suggestion is starting a loop and pull it most the way in towards your connection point, and then slipping in your chain, rhinestones, etc, and tugging tight. That was my most successful play. Also, quick tip, bandaids? Make awesome makeshift thimbles. Just saying.


I used the embroidery thread to connect the chain and bottom braid (yes this is the time to figure out which one you want on top or bottom, doesn't really matter, just taste). Also, make sure you leave a bit longer chain than your braid, mainly because that's what it looked like on the picture to me, and also it lets your pretty little tails dangle a bit easier. That second picture is just the best way I found how to hold things, so the weight wouldn't drag at the stitching and everything was secure and lined up.

Results!


Next, fetch yourself your rhinestone necklace. Seriously, I advise scoping out some thrift shop, perhaps a dollar tree, walmart? We couldn't find one at walmart, but maybe yours will be better. Because I checked at Joann's, and they want nearly thirty dollars a yard for a strand of those puppies. So yes, a refurbished necklace is great. You'll also need some lace scraps. I made do with what I had, though if I'd had the choice, I would have probably done something a bit more muted. My scraps were about a quarter inch wide, and hat seemed to work well. Also, messy seams are fine, they give it that whole kind of vintage distressed feeling.


Start with securing one or two rhinestones to the end of your bracelet, which I used regular thread now to attach, and sewed through the chain and between the stones. After you have a nice start, you're going to work in your lace, which takes a little manuevering, but it's not needing to be perfect. You're basically going to play with it until you get the look you like, and for me that included either letting it be a backdrop for the rhinestones, and sewing with it behind, or twisting it around for a few flashes. It's not hard, just takes a bit of time and thought on how you would like it to look, and going after it.


Clip off your rhinestones where your bracelet ends, and continue with the next row, following the same procedure with a new piece of lace. A tip of mine is the fact that I've yet to run into a jewelry project of mine, albeit they have been few and far between and not very complex, where I could not get away with using my nail clippers and tweezers as my jeweler accessories. That's what I used this entire project as well, and it suited me just fine. Warning, using your nail clippers can leave little chips in the blades, but I am always losing them, so at any one point I usually have two or three laying around, so I'm not too concerned.

After this is where my project kind of deviated from the original sketch, so to speak. I didn't have any other rhinestones available to me, so I decided that I had enough, I'd just add two more rows of the original I was using. This came after a long thought of whether to run outdoors, screaming that there was a rhinestone crisis happening in my apartment, and/or going to goodwill to see if I could find some more. But since I value my apartment, and didn't have a ride, I opted for the path of least resistance. I still like the way it turned out.

So, continuing, switch back to your embroidery thread, and attach another row of rhinestones. If you're following more precisely to the inspiration, this is where you'd start your bigger variety. To follow the styling, I looped one stitch between every rhinestone, and yes, it's a smidge time consuming, but in the end, I enjoyed the way it looked. I also sewed to the lace of the row prior, not to the rhinestones themselves, thinking this would be easier and look a bit better.

After clipping the end and repositioning the next row, do the same thing, though to further enhance the replica, I stitched back over the previous row, in addition to sewing on my new row. So one big stitch between the opening of rhinestones between both rows. I hope that makes sense. Here's what I came up with.


The last layer of the bracelet is a personal touch that you decide on. I suggest an old or broken necklace, which is what I found. It was actually what I based the design around. It was a broken piece that I had found in the box that my sister gave me, and I fell in love with it when I saw it. I've been ruminating over it for some time now, wondering what I could do with it. And opportunity presented itself! Now this might be better if you have a length the full girth of your bracelet, but I worked with what I had, so I lined it up, and then attached it, using regular thread, though I think embroidery thread wouldn't have looked much different since I looped it through several times. I also left the v of it unsewn, so it would be allowed to hang a little and leave an interesting bit of skin to be shown.


And there you have it folks! You have yourself a totally adorable new bracelet. I'm excited to wear it with a new dress I just found, seventy five percent off at Maurice's, only ten dollars. Super score there right? Here are a few pictures with it being 'modeled' har har, and I believe this is the way to wear it, or at least the way I'm choosing to. :)

As this is my first project like this, I'd really love some feedback, if there's anyone out there reading this. I plan to link it to Flamingo Toes' Think Pink Sundays, so I suspect most who might view this are from there. Anyway, again, I'd love to hear a bit of response to the design and/or tutorial!

I actually did it!