


So today I made something for my mother, and as such, I knew it had to be something that wasn't particularly... my taste? But really, would be something she loved. And to be absolutely truthful, I think my mom would fit right in in Jersey. Leopard print, gaudy clothes and jewelry, she'd absolutely love it. So I took this as inspiration, and created this beauty right here.

Isn't wonderful? It makes me giggle and feel so fun every time I look at it, I'm almost sad that it'll be gone when I give it over to her. But even then, it will be amazing on my blog, so I can visit it. Now, to go about how I made it. It was very easy, I promise. Mostly because I had everything I needed, since I bought remnants of the leopard spandex blend and the bronze satin when I was last at Joann's, specifically because I knew that they'd be made into something for my mother at some point. And here was my point! So, what y'all will need...

- Glue Gun
- Crepe Paper (colors of choice)
- Fabric for wrapping (I used a spandex blend)
- Accent fabric/Ribbon (I used satin) not pictured
- Wreath Mold
Now, to start, you're going to do, perhaps the obvious thing, which is wrap your wreath mold in your wrap fabric. I cut mine into about a two finger width strip, give or take, and then used a bit of hot glue on the beginning, and intermittently throughout the wrapping. Always make sure your ending and beginnings are in the back, easy hiding!

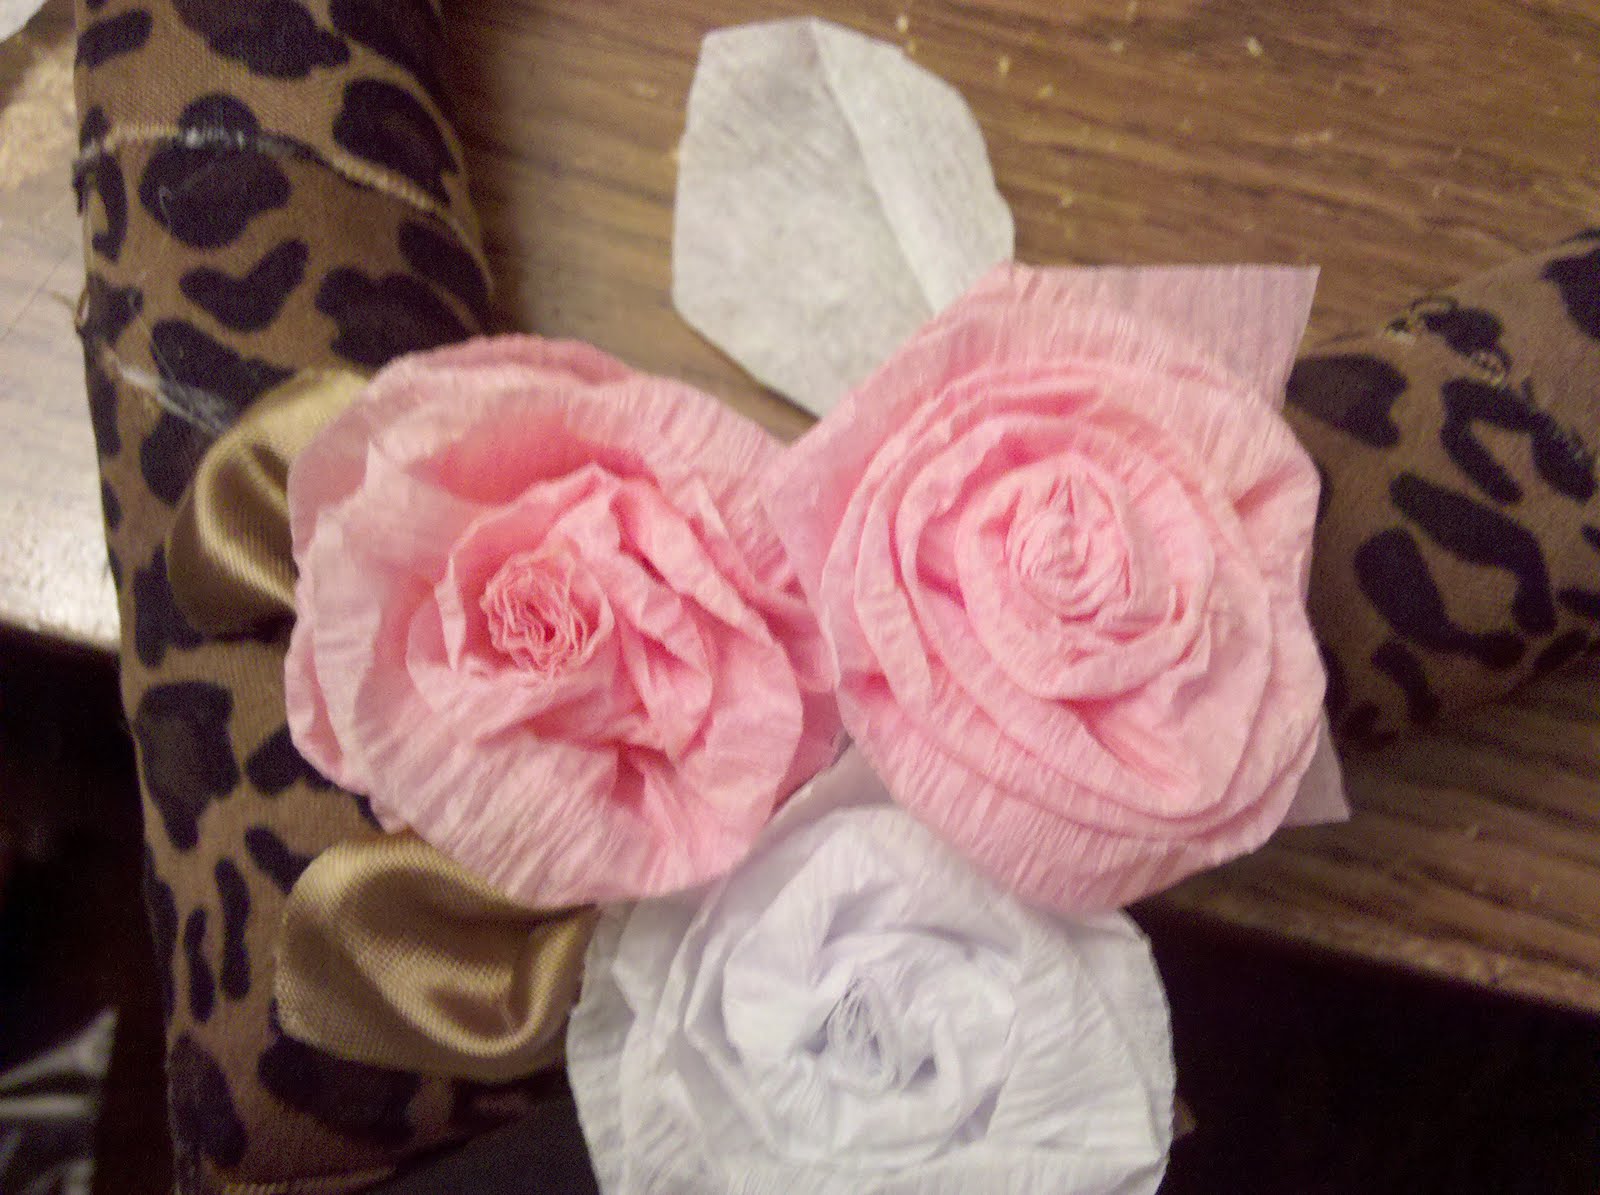
Then you're going to get out your crepe paper, and begin to craft yourself some roses. Be careful, because this is where you're going to burn yourself if any place. Also, apparently this stuff is nearly impossible to find anymore. I remember when you could get this in any party section, it was a staple. But we had to finally end up at the dollar tree before we found any.
If you've ever made fabric roses, they're kind of like that, though not having to fully twist the crepe paper outwards. A tip I found was to wrap it tighter towards the middle, and loosen up your wrapping towards the outside. Also, you can usually finger out the crepe paper into more petal like furls instead of straight, without having to twist the crepe paper so much. I used two different versions of roses, one where I didn't fold the crepe paper in half, and one when I didn't. This produces a longer stem or a flat back, so you can use that as a reference for what your needs may be.

To make my roses, I first touched a little line of glue down the width, to fold in the rough edge. Then tightly roll a few times to get the center of your rose, this is to personal taste how many times, I did it about three or four. Add a drop of glue, then continue to carefully wrap the paper. It's kind of an experimentation thing, as well as a practice thing. You know what a rose looks like, and to produce something like that, you roughly figure what you'll have to do. Remember to dot glue along the way, to help you keep secure and not unravel about at the end! If you are making longer stems, i.e. the full width of the crepe paper, just dab glue and trim the last of your trail. If you're making a flat rose, when the crepe paper is folded in half, (the opening facing downwards, mind you), dab glue to seal it, cut the tail so there's about an inch or so on the end, and cover the bottom of your flower with rose then the tail, to give it a nice smooth finish and voila!
Here's a picture of a long stemmed (left) vs a short flat rose (right). I prefer the look of the longer one better, since the petals are a bit more delicate looking. But I enjoy the workability of the flat rose better. So you know, you win some, you lose some.
Arrange your roses and secure with hot glue as you will. I chose to go a more minimal route, highlighting the leopard rather than the roses, but you can go as crazy as you want. I've just been seeing a lot of minimal wreaths lately, and kind of fell in love with the look.
I decided I also wanted some leaves to flesh out my roses, and decided to do them in the contrasting satin I'd bought along with the leopard print. To do these, I cut out a vague spade like shape, (my flowers ended up about 1 1/2", and the leaf shape was about 1 3/4" at the base), then pinched it somewhat accordion style. Sorry if my instructions are a little vague, I was kind of making this up as I went. Then I glued the v formed together, before proceeding to flip the leaf and glue the two ends to the sealed v. Now, pictures, and hopefully all that made sense. If anyone wants to know how I did it and my instructions weren't clear enough, leave me a comment, and I'll try and explain it better.

Then you use those leaves just as little fodder, glueing along the sides and/or the bottom to help stick em, something I enjoyed that there was options that way. When you're satisfied with your flower arrangement, you're nearly done with your project!

Now I'm sure some of you more experienced crafters can figure out how to do this a bit more gracefully than I, but I for one, am not a particular perfectionist with my projects. I also know my momma will love me no matter what. So, here's how I added my ribbon, which is actually two pieces all together.
Cut a slice of your fabric, mine measured about 5x19", but it's really a taste thing as to how wide you want it to fall on your wreath. Next I sewed a hem down each side, about to the edge of my presser foot, to allow for a nice neat edge.

Okay, to start, on the backside of your wreath, glue down your ribbon carefully out of sight. Then, wrap down beneath and towards the top. Make sure to pull it as taut as you're able to ensure smooth lines and contour to the heart. Then run a narrow line of glue there above where your piece started, but not sealing it up. Mainly, this is so you can make darts, for lack of a better term, along the under curves of your heart, to make sure the fabric is flush and you don't lose the quintessential dip of the top of a heart. If you're making a round wreath, this is obviously not an issue. Then, I cut my ribbon at a bit of a v, and folded it down to glue along the edge of the back and bottom, to cover up your mess a bit, though if it's not completely covered, don't worry, going to be adding a bit more ribbon here shortly.

After this, I folded the rest of my ribbon in half lengthwise, right sides together, and put in a quick seam. Turning it right side out and pressing it, this was my hanging ribbon. You can do this any way you really wish to, because it's taste and preference, but I didn't like the look of the thick ribbon running up from it. You could also prepare a thinner ribbon the way you did the thicker, but I enjoy saving things for other projects as well, so decided to use what I already had.

I folded my bottom edge up a bit and glued it down in a faux hem, mainly because I dislike the look of messy lines and such.

And after gluing it to the back of your project, voila! There you have your project. All finished and beautiful. I really loved how it turned out, and hopefully it works as inspiration for someone else out there! It's also fairly cheap, especially if you use scrap fabric and/or remnants.
Happy crafting!
love the animal print! so unique! thanks for linking up :)
ReplyDeleteThat's cute! Very original! Love it! Thanks for linking up with us at the Find Some Love Fest!!
ReplyDeleteAll The Love In The Universe
Digger
love the animal print... such a cute idea!
ReplyDeletewith love,
meg
follow me @ http://somethingbeautifultheblog.blogspot.com
Love the leopard print!! :-) We have had so much fun with the Find Some Love Fest link up! It's a great way to connect and support fellow bloggers.
ReplyDeleteWe are following you and would love for you to visit our blog.
Jayme & Mendi @ Her Late Night Cravings
Too fun...that's the first leopard print valentine wreath I've ever seen. I bet she'll LOVE it. Thanks so much for sharing at Shine on Fridays! :)
ReplyDelete