


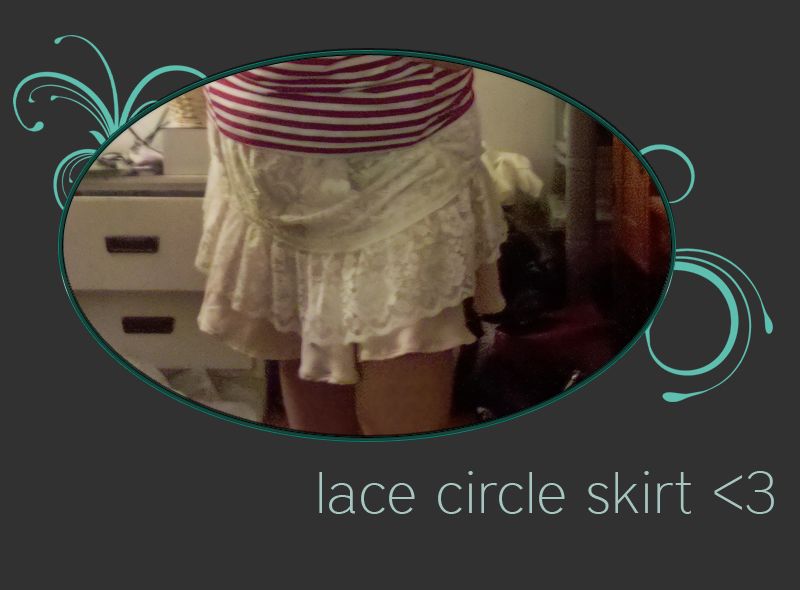
To give credit where credit is due, the inspiration I got to make this was from the wonderful and ever bountiful Pinterest! I saw this pin somewhere or other, and couldn't help but try it, since I am always excited over vintage styled clothing, that extra feminine touch, but yet I don't actually have any. I think it's mostly because my shape is kind of hard to fit, with being short and round, well, it's just easier to make things for myself if I want it to fit right, especially skirts, since anything that is meant to be short on someone with my typical waistline, is not built to be just as incredibly short as I am.
Anyway! Getting back to point! The original project came inspired by Abby over at Morning by Morning Productions. I instantly fell in love with it, mainly because it was so sweet and simple, and looked so classy and elegant! I made this entire project in an evening, not even my whole evening, and it turned out to be my new favorite thing to wear. Now, onto my own little way to make it, as Abby offered the inspiration, but not a specific tutorial. In her post, it mentions Dana over at Made, and that circle skirt tutorial really saved me here. It was the base of my skirt, since I honestly couldn't find a tablecloth in a thrift store, and just the shortened valences, I made the lace part an overskirt over a crepe circle skirt underneath. I really love how it turned out, and here's how I went about making it!
First of all, make your pattern for your underskirt. Dana takes you through a wonderful way to do this.
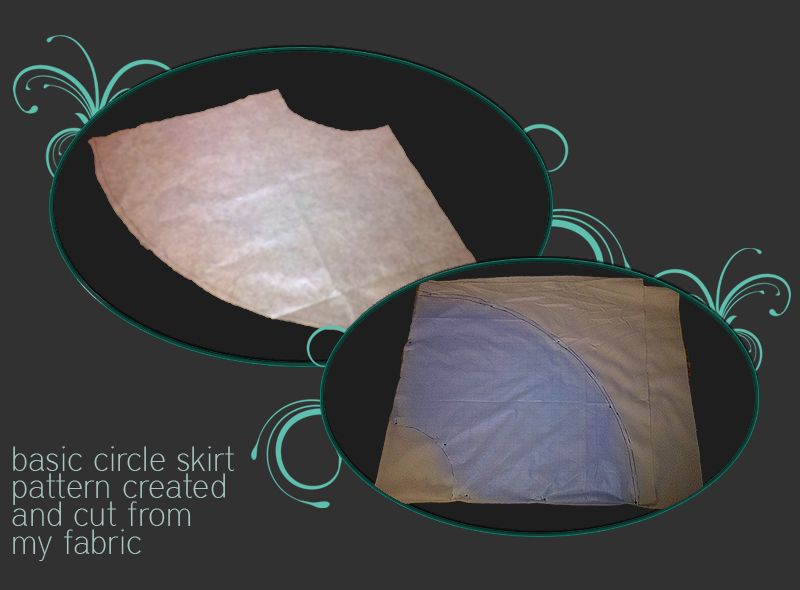
Basically, you're making a quarter of your skirt. The inner ring is made by measuring your waist, plus 2 inches for a bit of give with the elastic, and dividing it by 6.28. Then the outer part of the ring is the measurement of the length of your skirt. This forms a quarter of a 'donut' that will be your skirt base. This is just the bare bones of what it is, and Dana explains it much better, along with a cute little diagram, so I do encourage you to go look at that for the more technical elements.
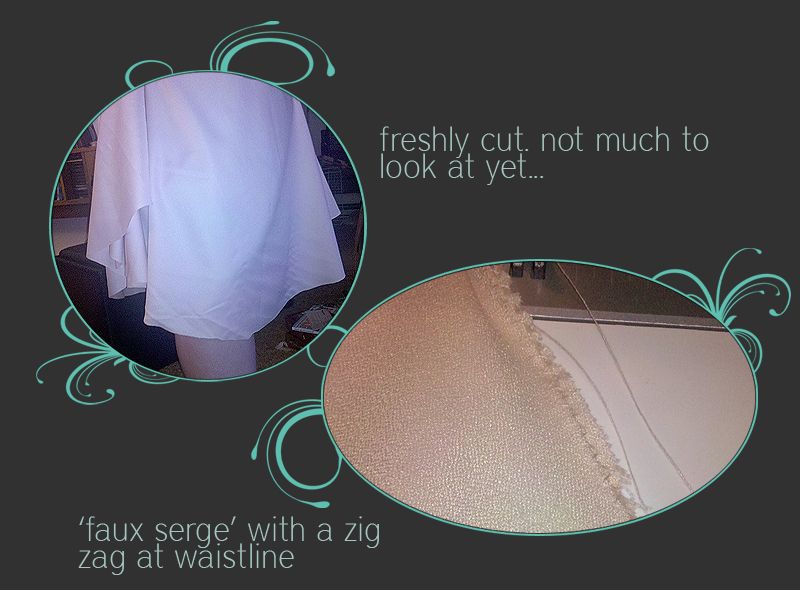
Here's how it'll look held up to you. The waist will obviously be a bit big on ya with that extra bit of give for the elastic waistband. Then I used a bit of a zigzag to finish up the waist band. Especially since the crepe material seems to be a bit prone to fray.
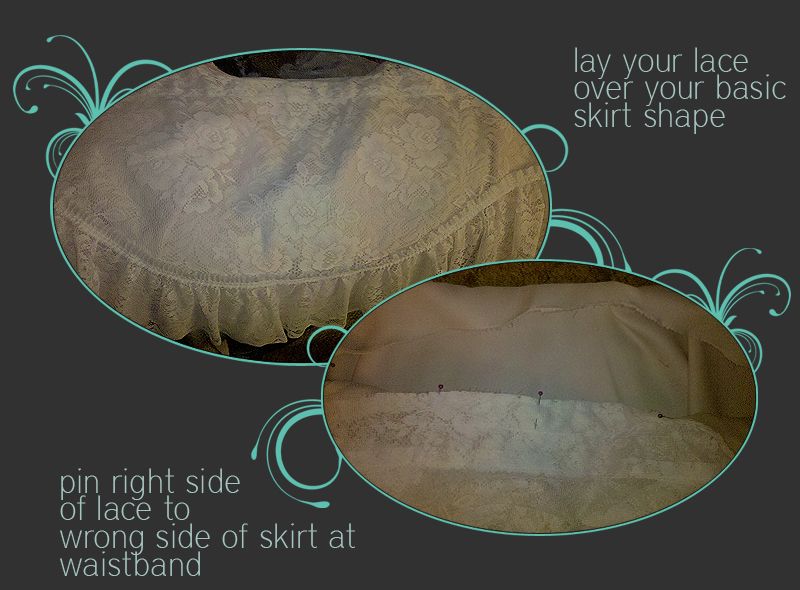
All right. Next step is you want to position your lace over your skirt base. This is where you can take the time to get it basically situated in your head just what you want your final product to look like. I really enjoyed teh valences because they already had the decorative touches of the bit of ruffle as well as the loop where the curtain rod goes through that added a bit of an illusioned waistband. All in all, I was happy with the way it turned out. Now, in adding your elastic waistband, you actually sew it over the top of the waist of your skirt. so this particular joining doesn't have to be all that pretty. But, if you want it to be, the way I did it was pinning the right side of my lace to the wrong side of my skirt. That way, when you were finished, and turned everything right side out, the right side of your lace would be facing outwards, and laying over the top of the right side of your skirt. Make sense?
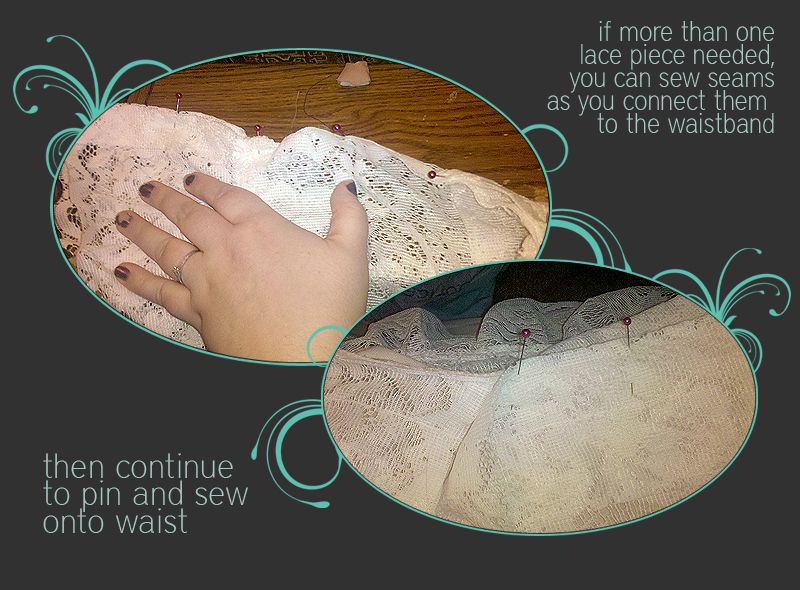
All right, if you're like me and you A) need more than one piece of your lace to go around you, and B) don't entirely know how or are too unconcerned/lazy to measure just how far you need it around your waist, you can do what I did. One piece of lace was already secured to my skirt, and I simply drew out the length of it and did a simple seam to the next piece before pinning and continuing to sew it along the waist. Fairly simple, didn't take too much creative maneuvering. I did run into the slight trouble that my back piece was a good three inches maybe longer than my front piece, which I found out after I'd already secured everything. Even though the bottom, the top, and the ruffle design were the same, for some reason the pieces were not the same length. So, I solved this by adding a number of small darts/ruffles between the lace ruffle and the top. It gathers a bit, but in the way I wear it, and really unless you look incessantly close, you can't really see it. Gotta love creative improvising!
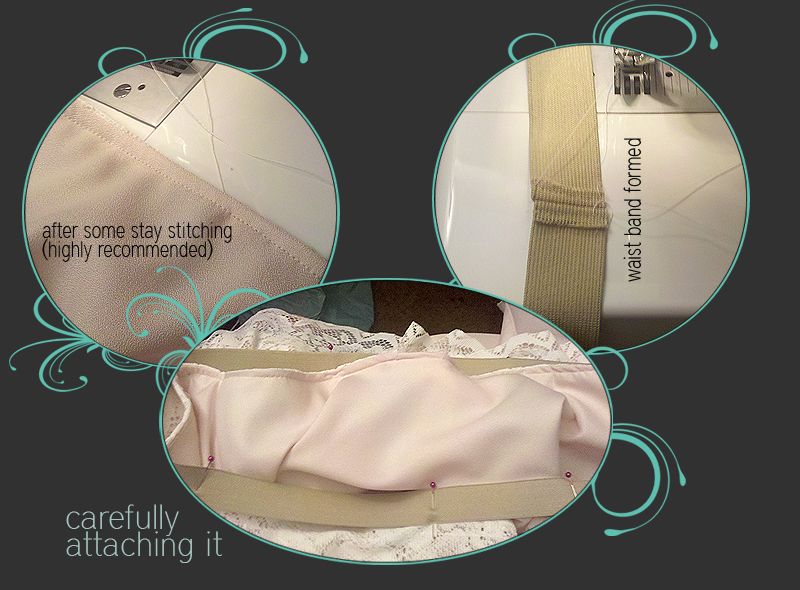
As I noticed my seam was rolling a bunch on me, I did a bit of stay stitching on the waist next. Then I formed my elastic waistband, simply by sewing the piece together at the ends and laying out the seam and sewing the edges down so it laid better. Here is where I suggest you hold up you rskirt once more against yourself and figure out just where you want the front and back. I made a booboo in thinking what I wanted as the front was going to end up as the front. So technically, my waistband's back is in the front of my skirt when I wear it, but since you can't see it with a normal shirt, I'm not too concerned.
Also, I highly suggest following Dana's instructions on connecting this waistband. I didn't take many pictures because a) I was excited to finish my project, and B) I figured you'd have that to look onto. She does wonderfully explaining just how to do it, and someone like me who's never sewn on an elastic waistband, it made it super easy. I was entirely proud of myself truth be told.
After a small hem to your base circle skirt, which I used the zigzag stitch again because I like the look of it, you're finished! See? Wasn't that an easy super simple project? But I have already fallen in love with it. The skirt flows beautifully, and makes me twirl all the time. It just makes me feel feminine and pretty without being overt and obvious in it's appeal.
I hope you enjoy your project as much as I did mine, and feel free to drop any questions you might have to me!
P.S.
I'm planning on linking this up to a few different link parties, so go check out my page about em and see what other awesome crafts people have to offer!
Happy spring!
Beautiful! So talented!
ReplyDeleteLora
That lace is beautiful. I don't have that much time.
ReplyDeleteI am visiting from the Linky Blog hop and I am a new Linky and GFC follower just in case it sticks around.
I'm dropping by as the guest judge on The CSI Project this week. Great job! Your skirt turned out beautiful.
ReplyDeleteThank you so much! I am super excited to be participating again!
Delete